Want to make WordPress multiple languages and wondering where to begin? In this article, I’ll show you how to translate your WordPress website into several languages of your choice in minutes.
If you’re running your website off WordPress.com, make sure you’re on the WordPress business plan. Otherwise, you’ll need an upgrade to use third-party plugins.

All right, let’s get started.
1. Polylang
Polylang is a free WordPress plugin developed by Frédéric Demarle. It can automatically or manually translate your web pages. Manual is best for quality control, which is what most businesses prefer and you can add as many languages as you want.
Installing The Multi-language Plugin
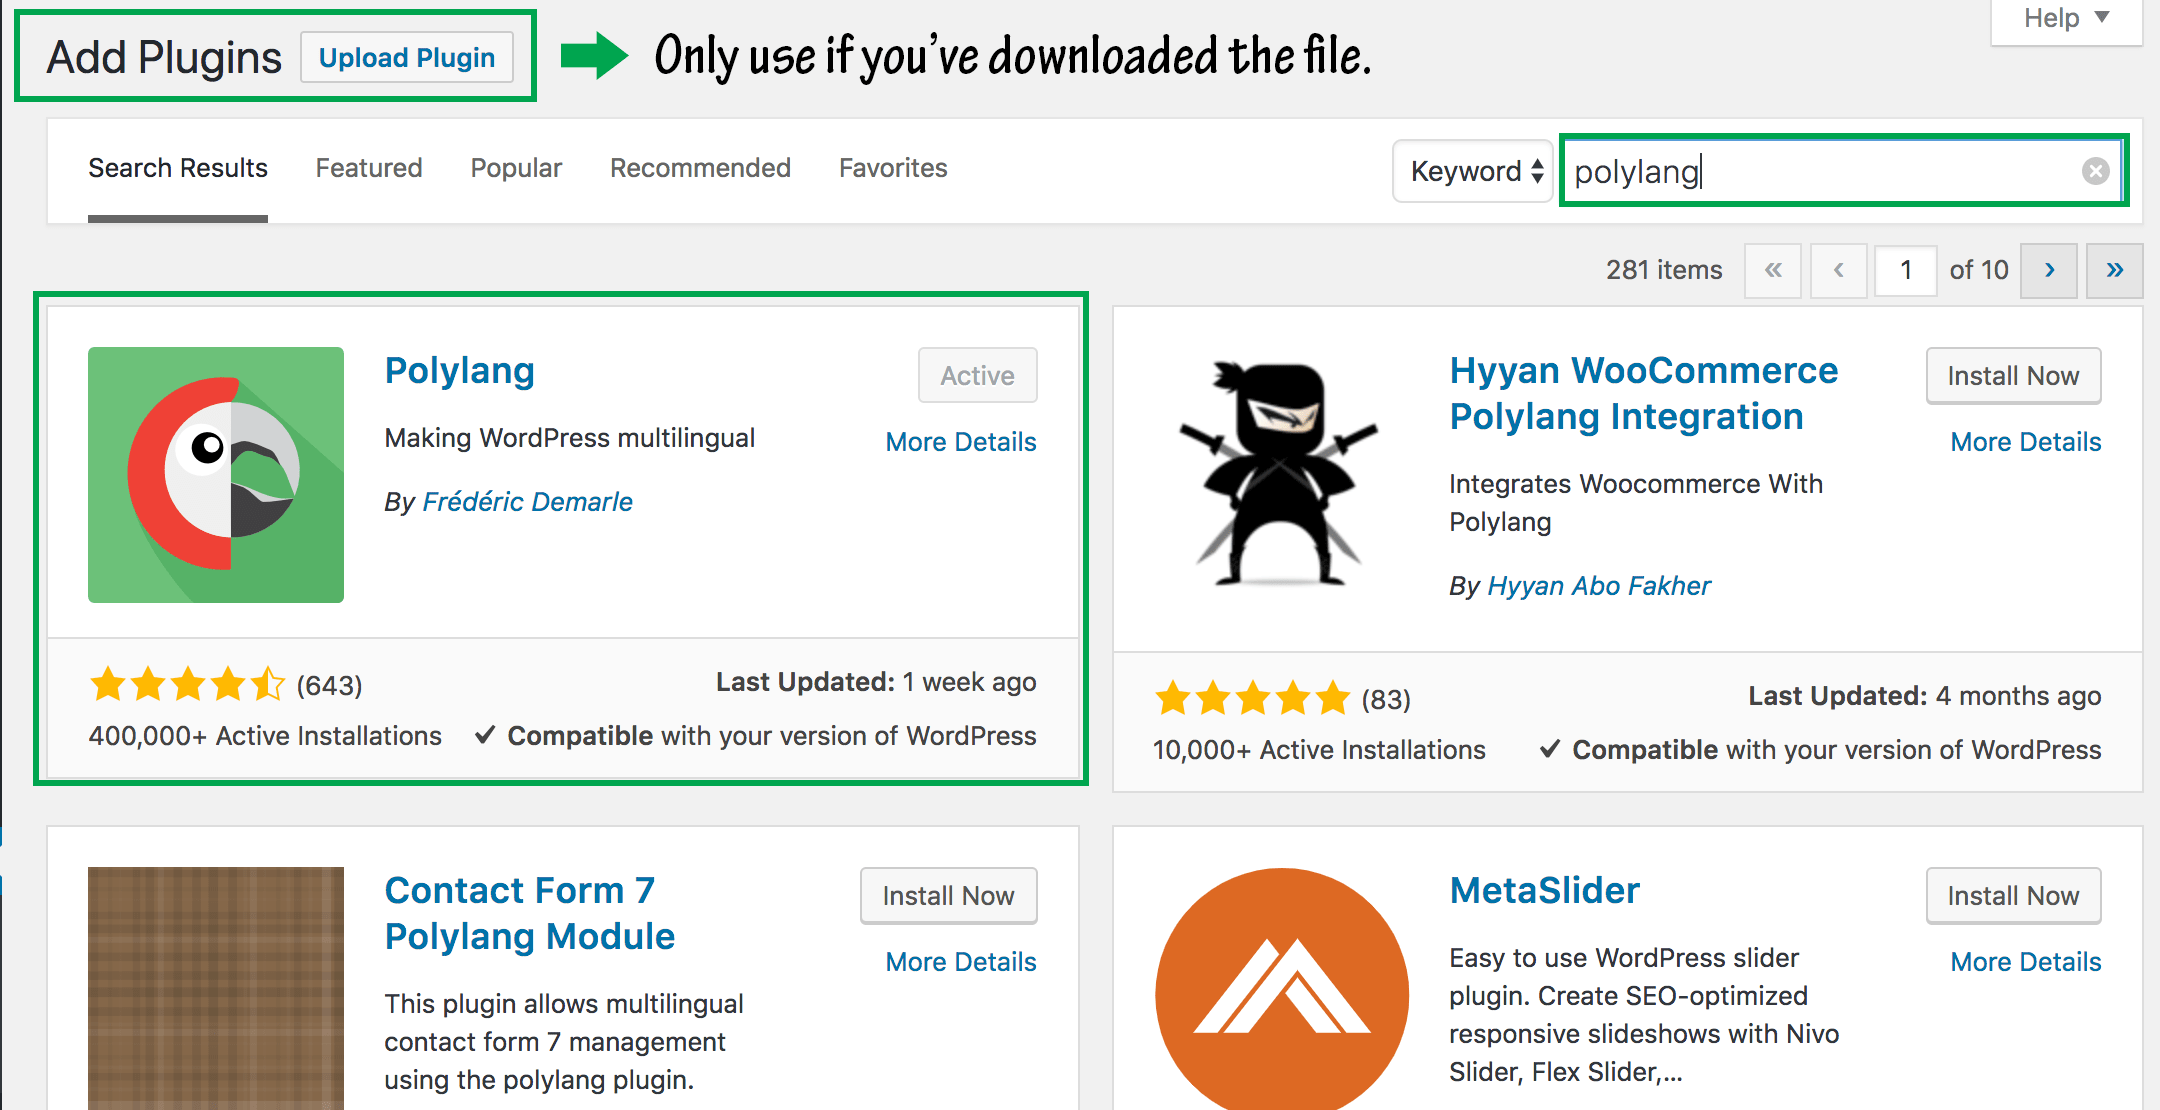
First, you’ll need to install the Polylang plugin by downloading and uploading it to WordPress. Go to your WordPress admin dashboard. Using the left navigation menu, locate plugins and navigate to add new.

There, you can either upload or search for a plugin by name, then click install now (on the screenshot below, Polylang is already installed and activated).
Setting Up Polylang
After installation, locate ‘Languages’ on the navigation menu. You’ll see a submenu containing languages, strings translations, settings, and Lingotek. We’ll cover all of them today.
Select languages from the submenu. On the new screen that appears, you can add as many languages as you need on your site.
Also, by default, the latest version of Polylang gives you the option of activating Lingotek, a professional translation management system. Activating it will help Polylang auto-translate your web pages. However, I don’t recommend this if you want to ensure the quality of your page copies.
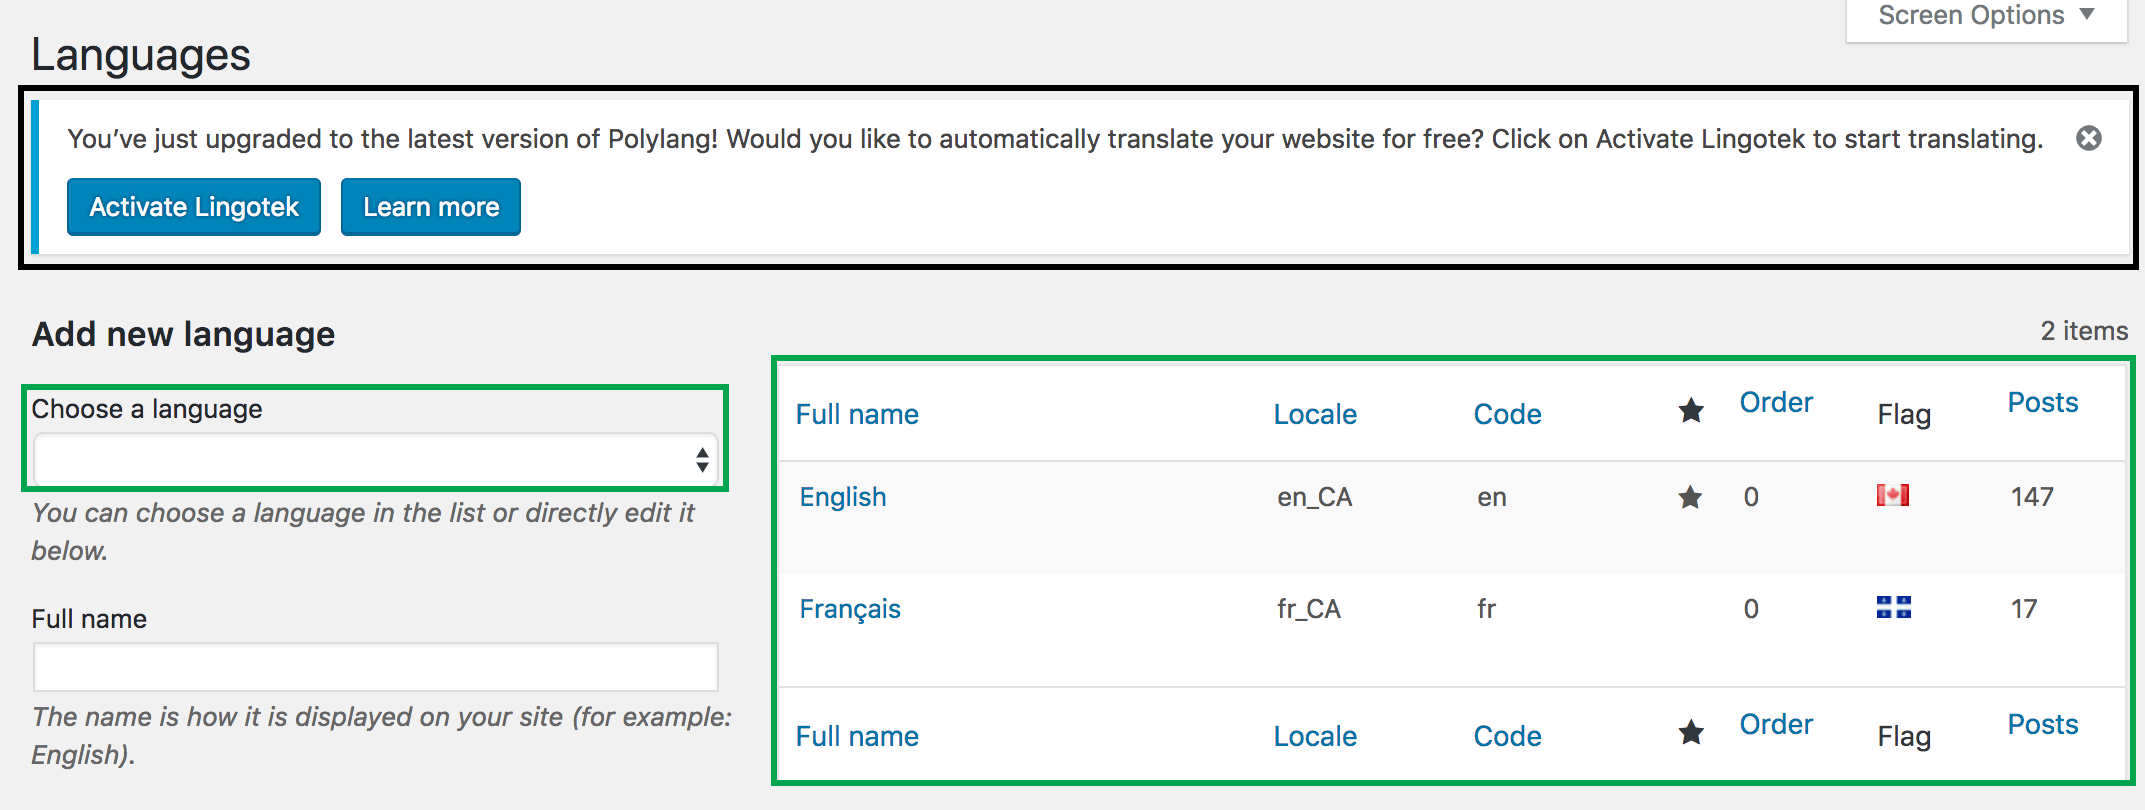
On the above screenshot, our Polylang installation already has some languages added to it, which you can see on the right-hand side. A brand new installation will require that you set a default language and add all other languages you want to make available on your site.
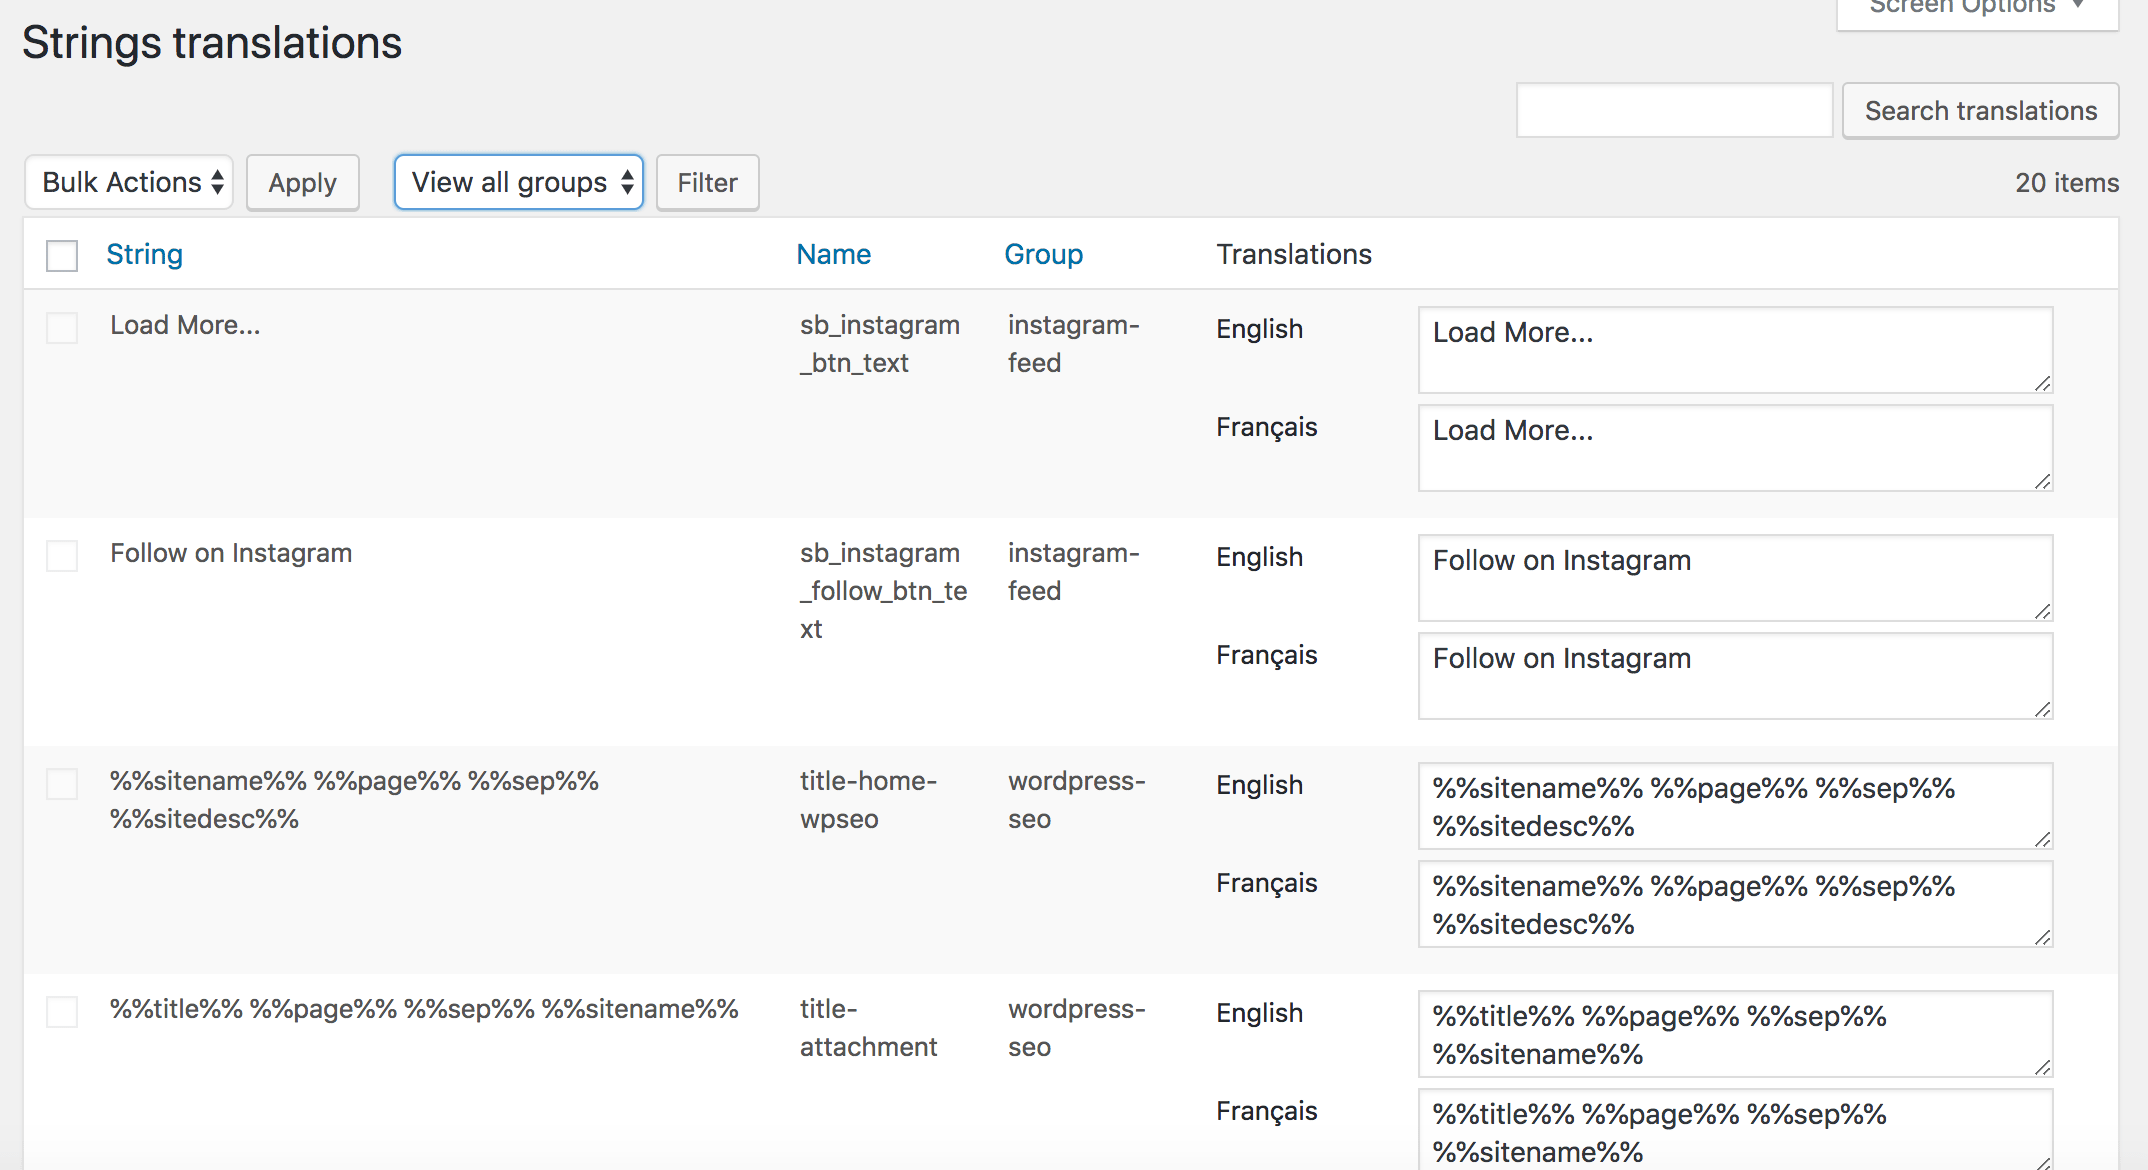
You may also want to translate any qualified strings such as default phrases that appear throughout your website. To do this, visit strings translation from the submenu and there, you can translate any string.
Now it’s time to go over settings. On the settings section, make sure that Detect browser language and Media are activated. The former will set the language according to the user’s web browser when a web page is visited. The latter activates languages and translation for media.
On the settings page, under URL modifications, click settings. If you are using a web page builder with WordPress such as Beaver Builder, then you may keep your settings as seen in the following screenshot.
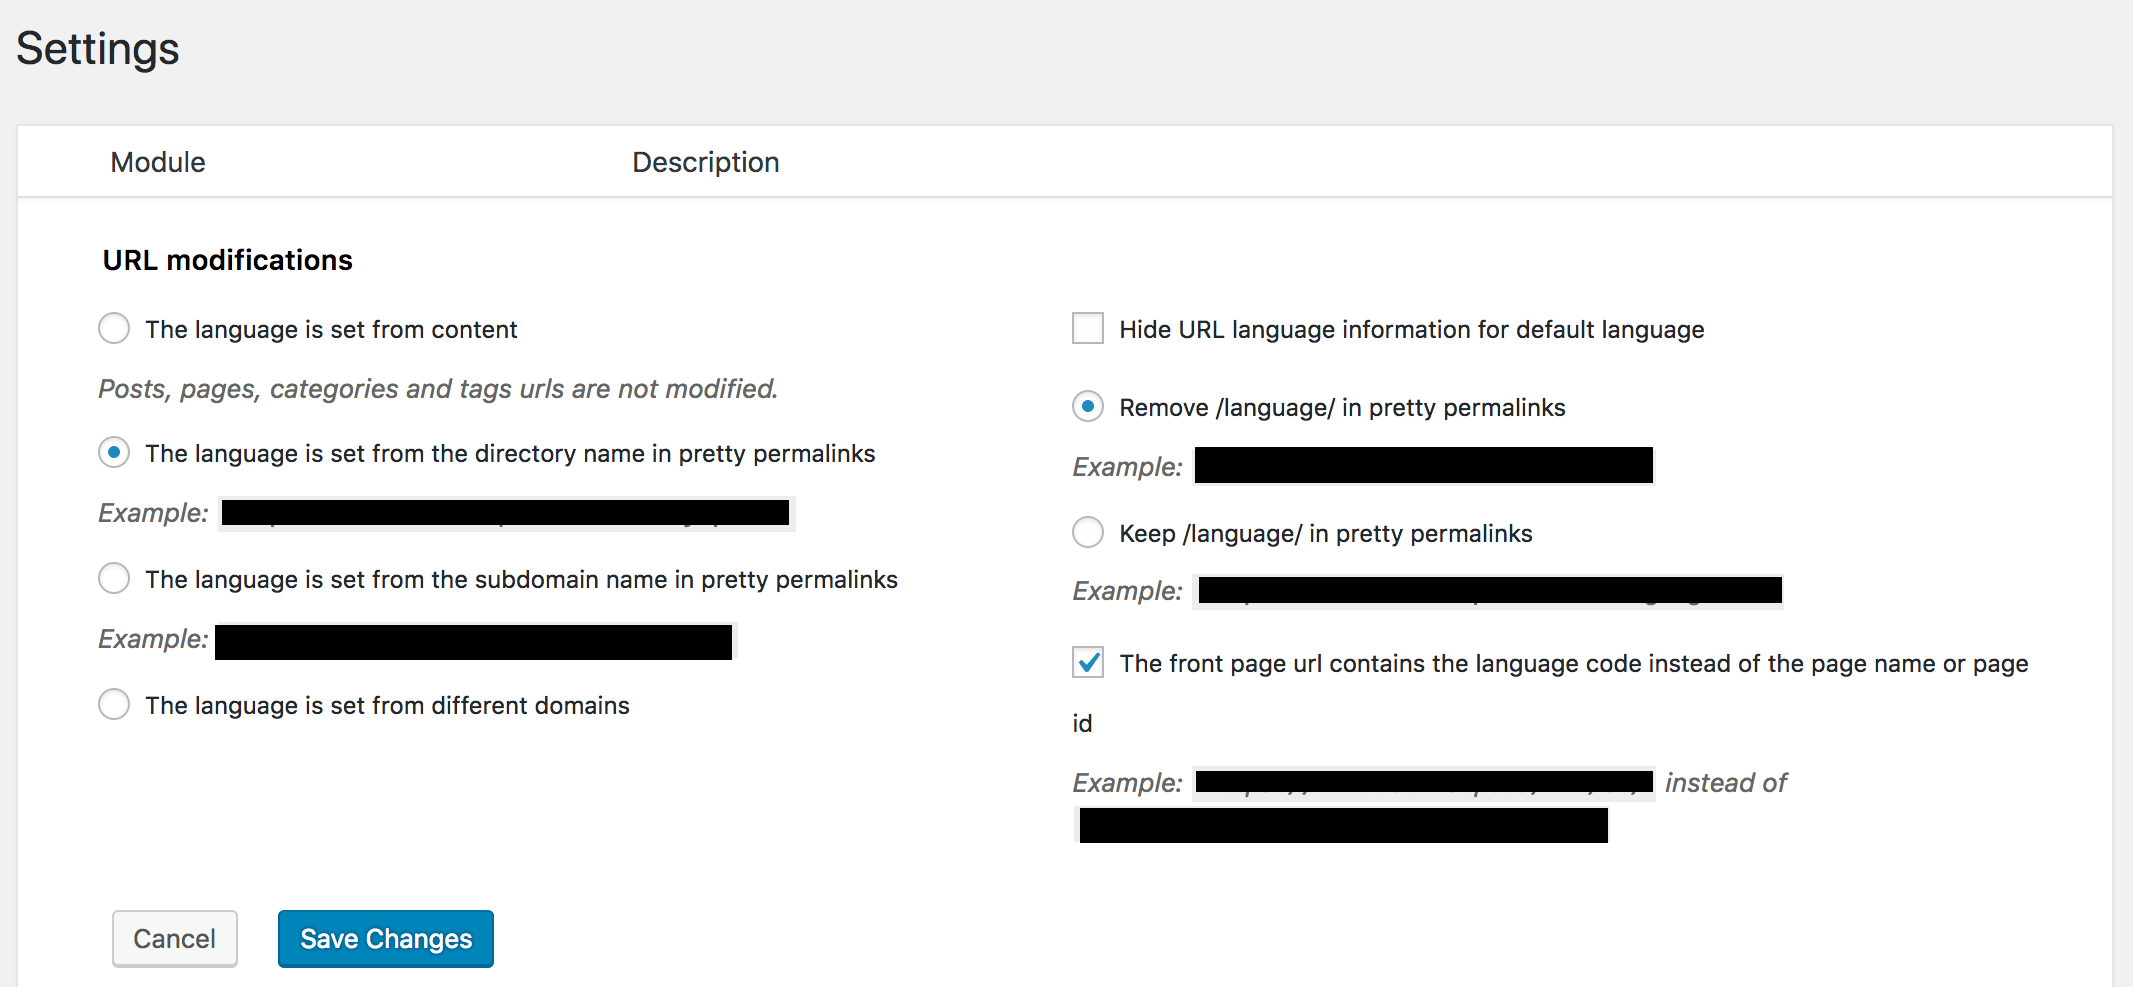
However, for most users, it’s better to select this option: ‘The language is set from content’. This is because, with the pretty permalinks option selected, if you ever turn off the plugin, all links that were created due to URL modified translations will become broken. Hence, your visitors will see a page not found error or 404.
That being noted, modifying the URL for language translations is preferred for SEO.
Translating Your WordPress Pages/Posts/Categories/Tags
Go to the WordPress post or page that you want to translate and there, locate the Translations tab on the right. Use the flags as a way to identify a language. Select the language you want by clicking on the plus sign.
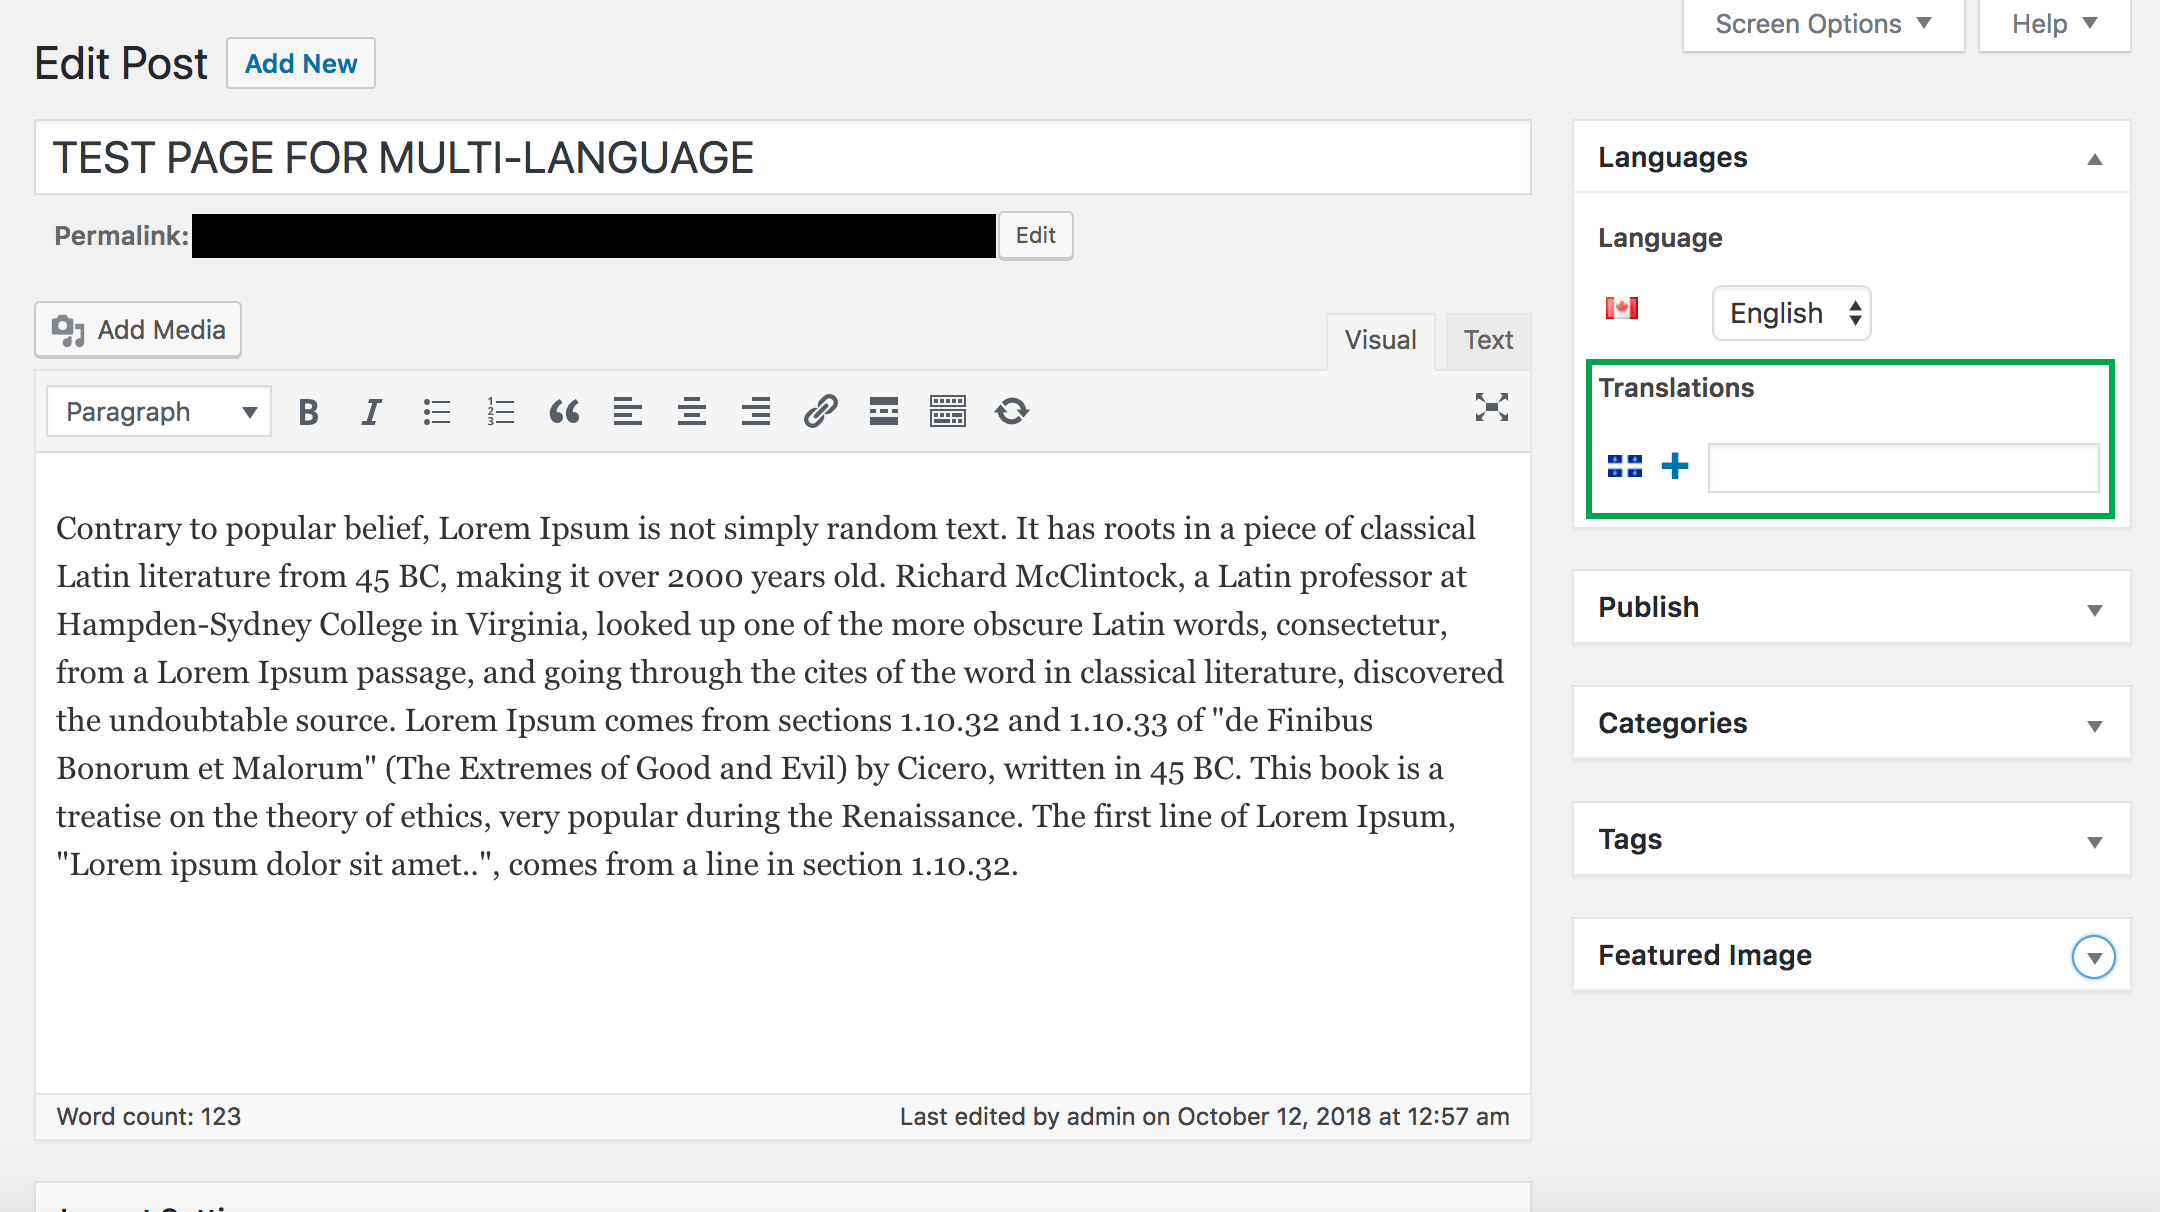
This will create a new page or post where you can insert the translated copy. Publish and you’re done!
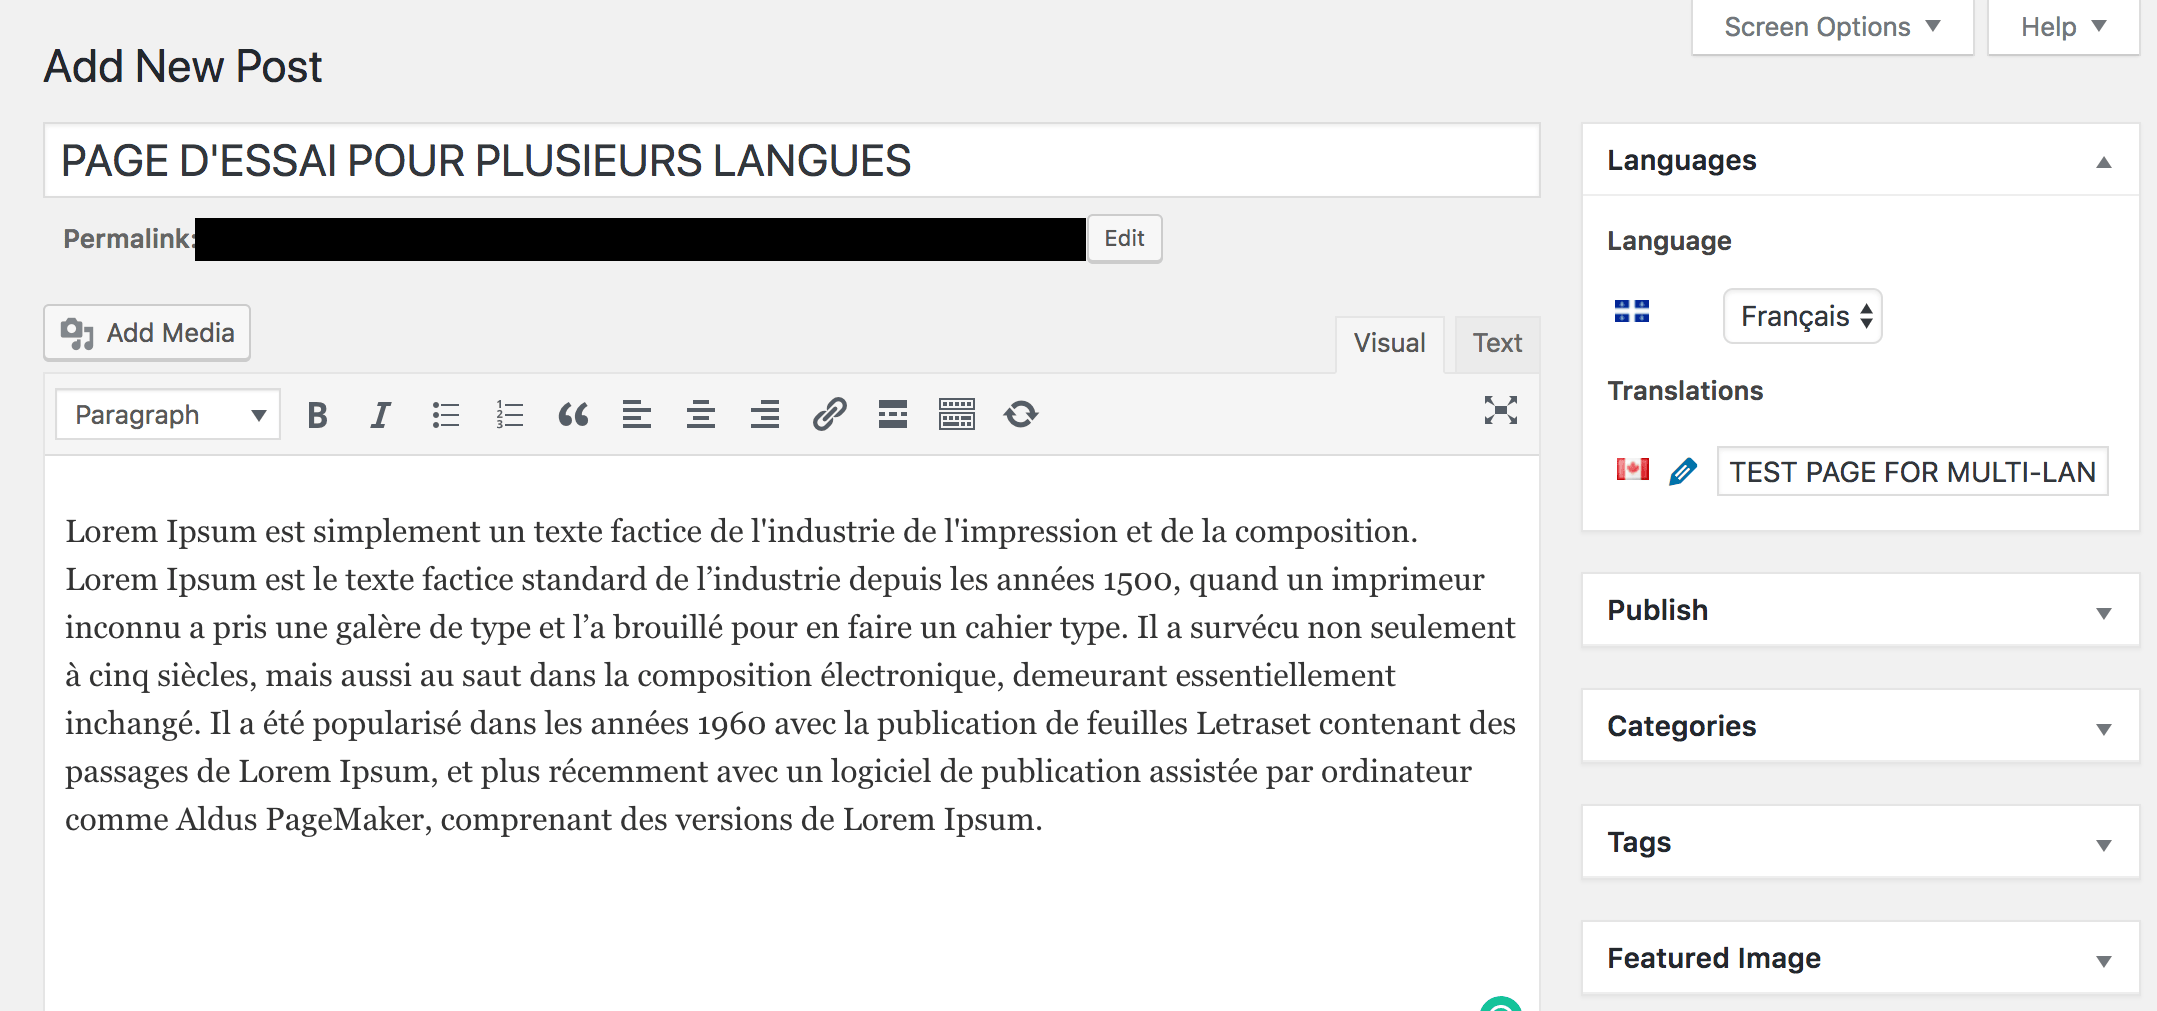
You can also translate categories and tags using the same process. Just visit the category or tags section in WordPress, and then click the plus icon next to what you want to translate.
Displaying The Multi-language Switcher
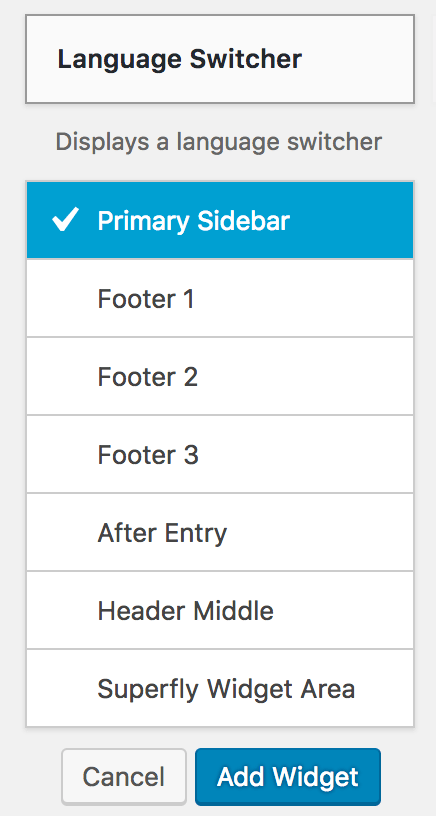
Adding a language switcher allows visitors to quickly switch between languages on your website. There are two ways to add this. Go to your Menu section in WordPress and add the language switcher to your main menu.

The second way: Go to Appearance >> Widgets and add it to an area on your website.
2. Use Google Translate For Multiple Languages in WordPress
Sometimes you may not have the resources, nor time to manually translate your posts or pages. This is where the Google Translate Plugin is really useful! Again, auto-translations aren’t recommended if you want to control the quality of your web copy.
First, install and activate the plugin, then visit Settings >> Google Language Translator to configure it.
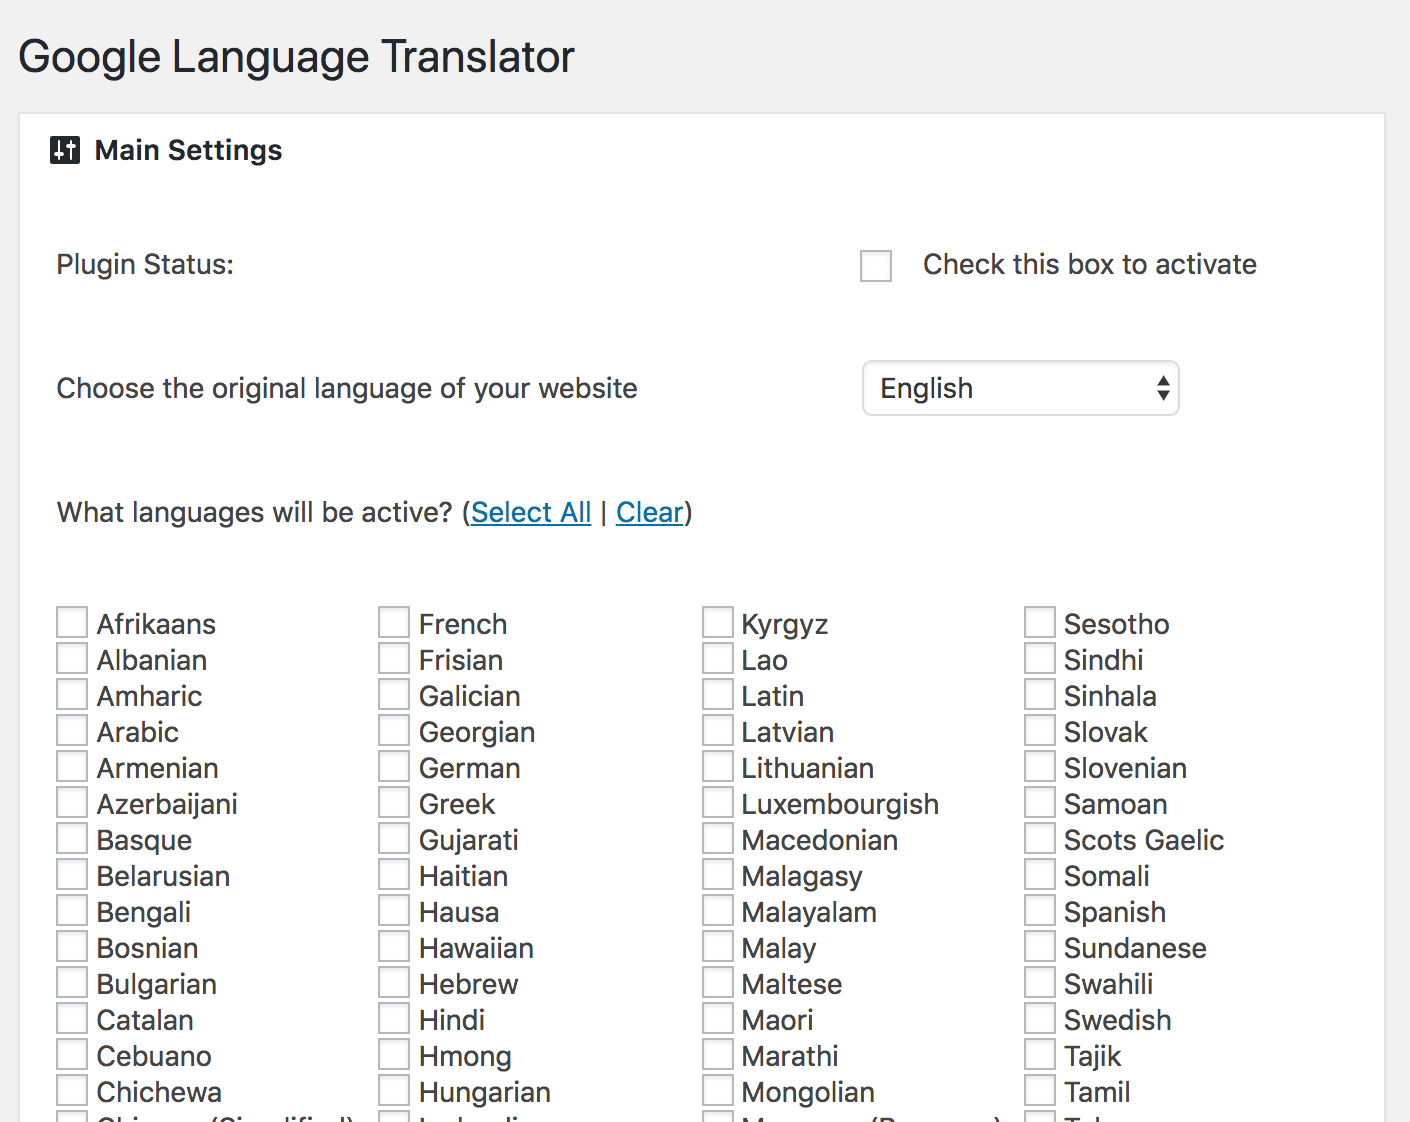
From here, you can pick the languages that you would like activated, decide how you want the language switcher to look and behave. This plugin is very customizable so make sure you’re going through all of the available options.
That’s it! You now have two ways of adding multiple languages to your WordPress website. If you liked this article, please give it a share or join this blog for exclusive member-only content.
Learn how to make WordPress multiple languages for free.Click To Tweet
I’m a freelance copywriter and SEO specialist. I aim to empower individuals and businesses with impactful marketing solutions and insights. In my downtime, I recharge by embracing the beauty of nature or cherishing moments with my loved ones. If you found value in this post, please consider sharing it.
Want a heads-up once a week whenever a new article drops?


![30 Business Ideas to Make Money in [year] (Only the Best) Business ideas article quote.](https://techhelp.ca/wp-content/uploads/2021/08/business-ideas-300x150.jpg)
